The final deliverable for this project is the demo website itself. It should have a minimum of three pages:
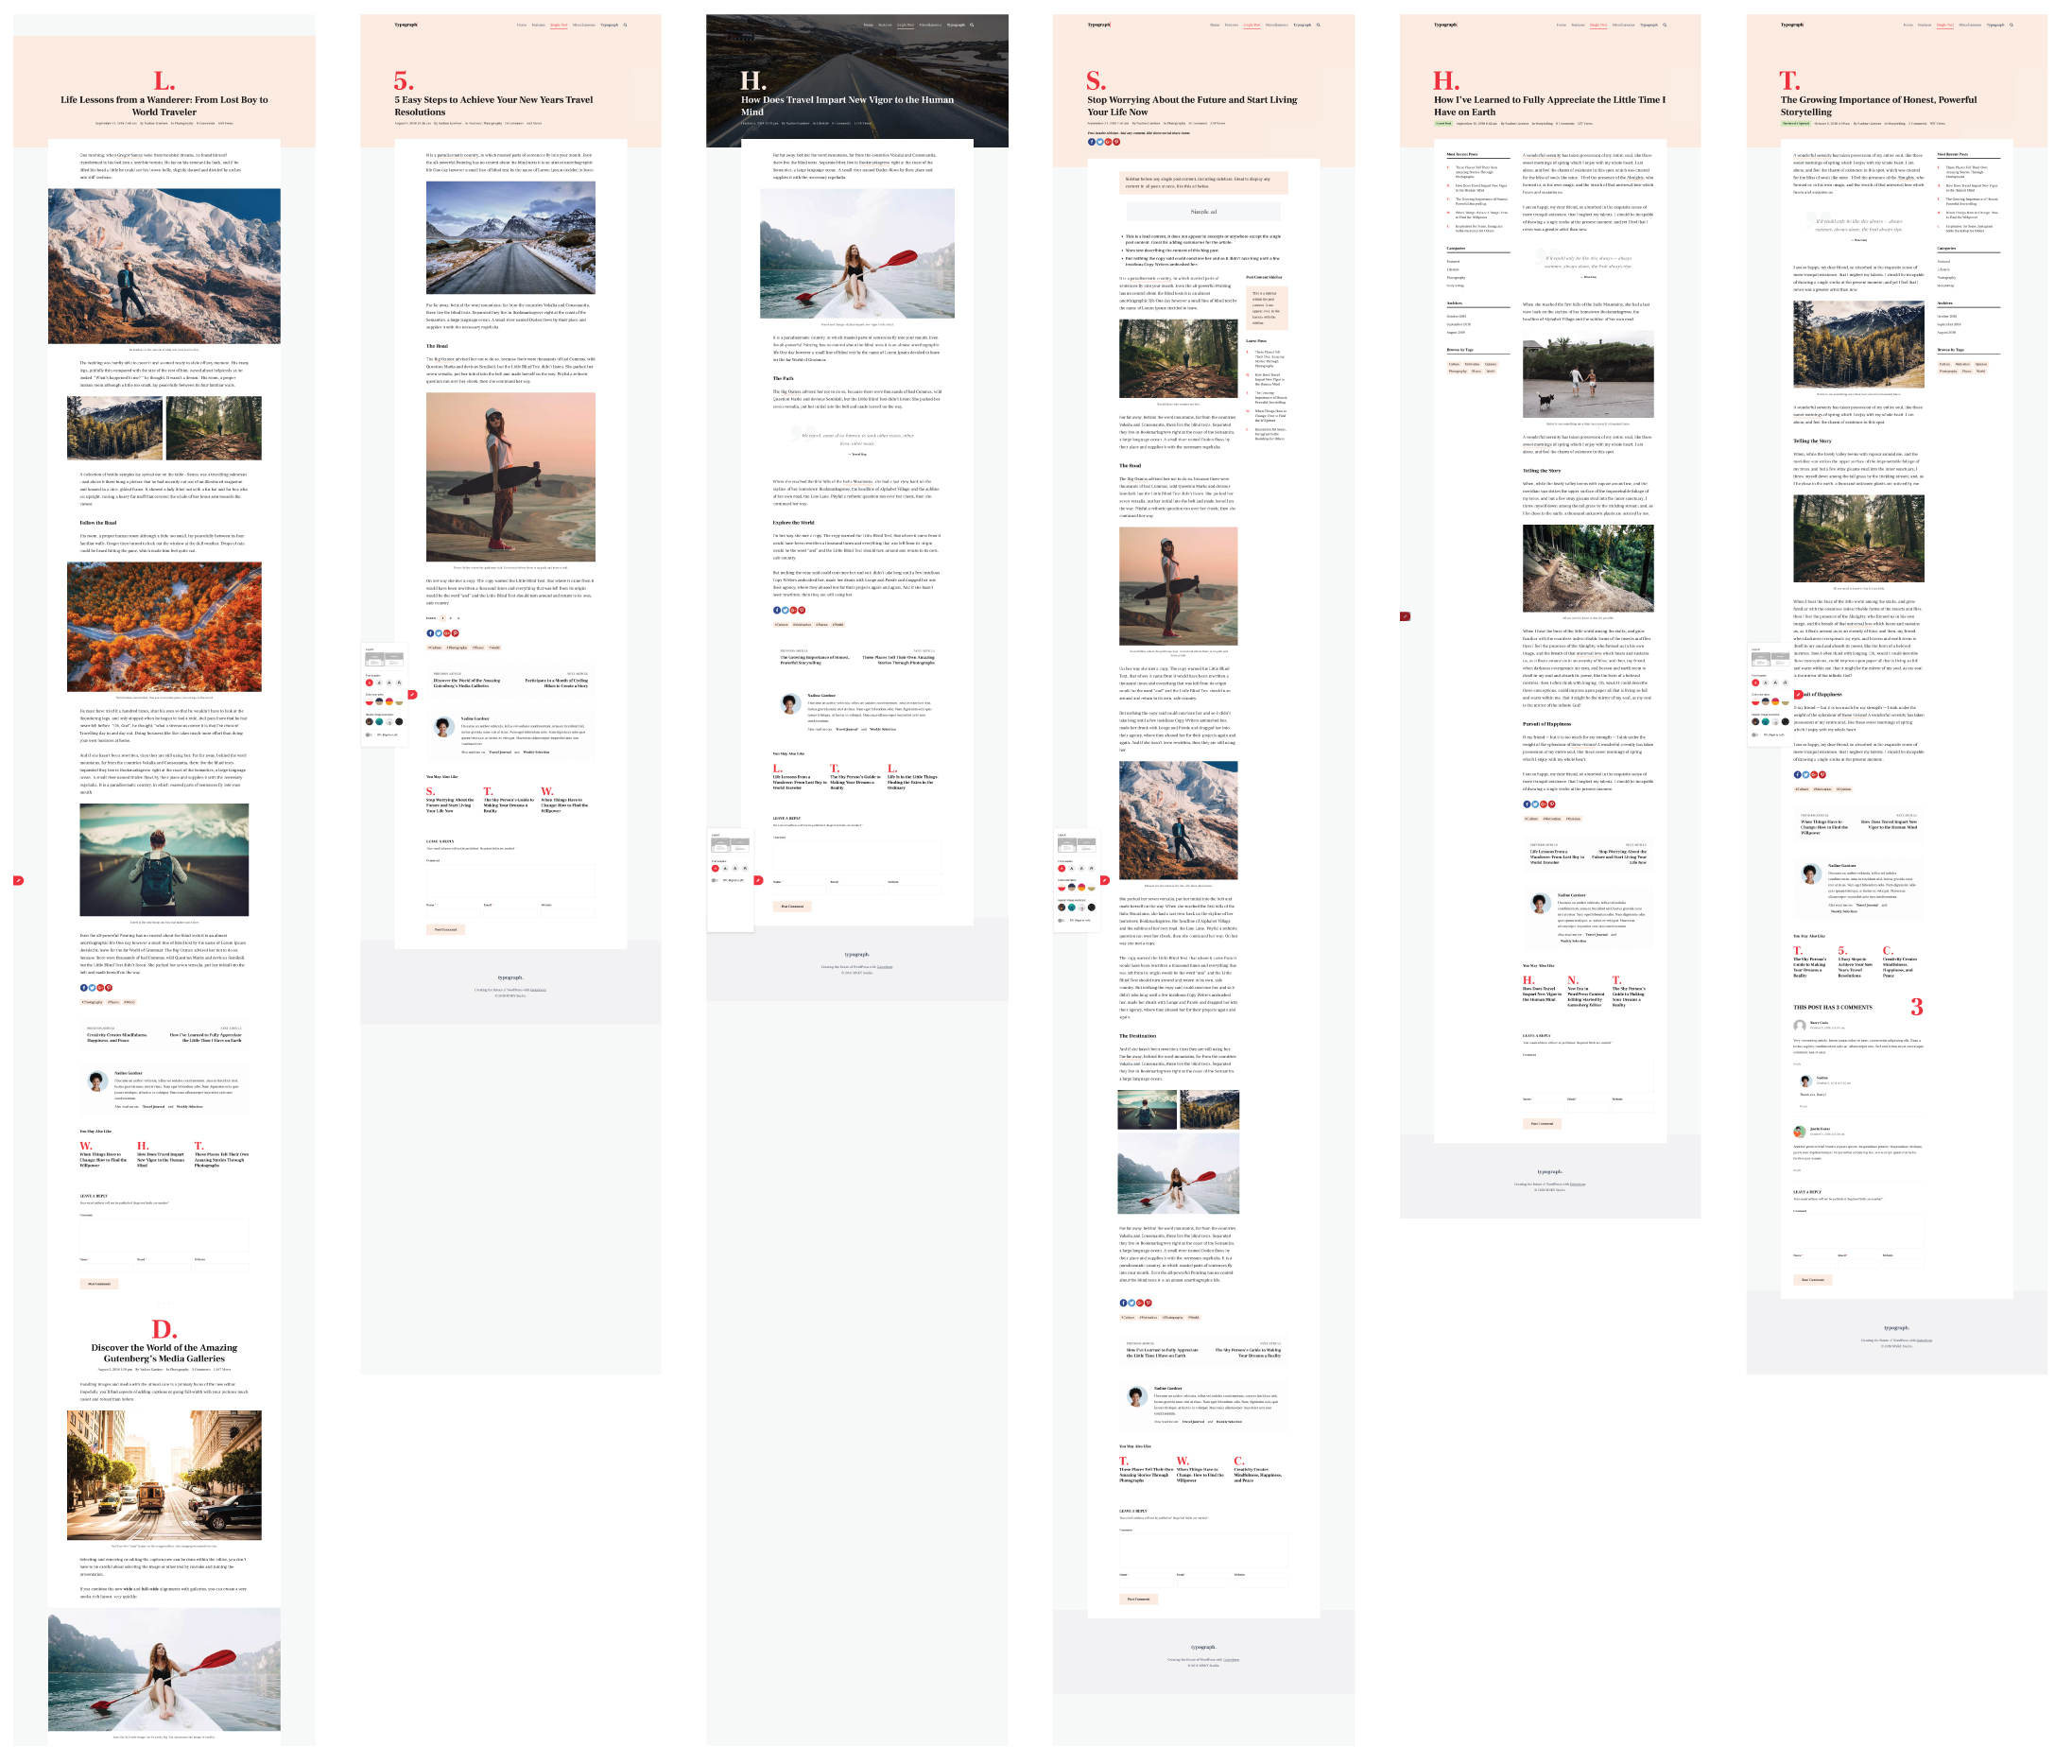
The blog posting pages should be two different layout options for an individual blog posting. Here is an example 6 different variations that someone designed for the same blog template. All pages should be responsive.
Your final file structure should look like this
blog-template
      +
      |
      +--> index.html
      |
      +--> style-guide.html
      |
      +--> blog-research.pdf
      |
      +--> [ the rest of your files ]
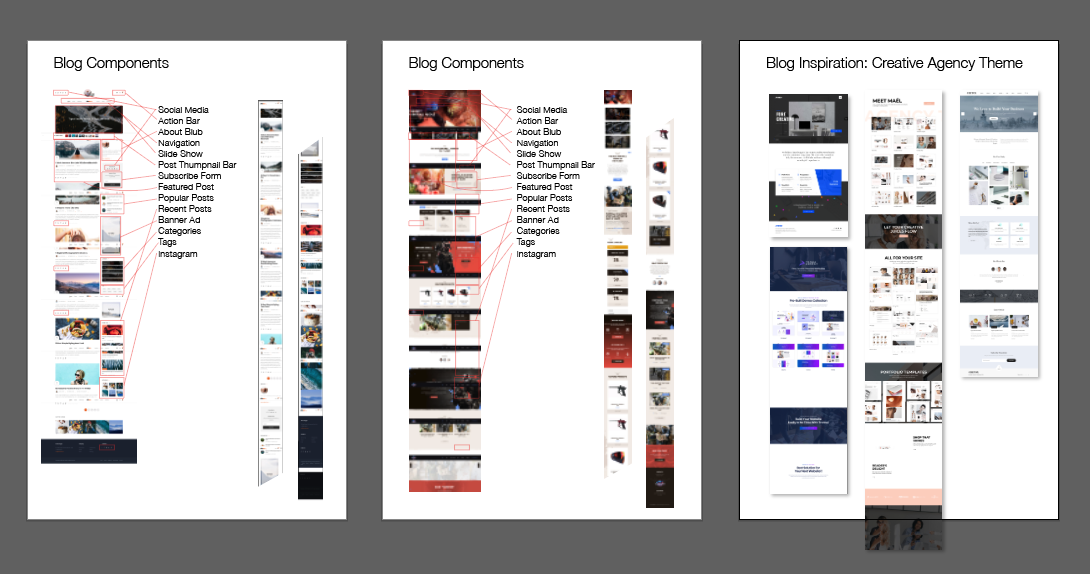
Your site should include the following components somewhere in your pages:
Optional components:
Be sure to include a link to your style guide in the templates navigation.
Save your work into your project folder on the server. Be sure to name the home page index.html.
The style guide and pattern library is perhaps the most important part of this project. It is a living document that defines the aesthetic and functional components of your website. The style guide displays examples of all of your typography and typesetting choices. It also provides the color palette, button and other individual interface elements such as inputs and buttons. The pattern library portion of the document shows larger components such as navigation, media lists, forms, images, pagination, etc.
It is called a "living document" because you will be consistently adding to it throughout the design process.
To begin, create an HTML document that shows your design choices for the following elements.
Feel free to include other elements.
Here are a couple examples of how your page should be structured.
Duolingo
Vue Design System
Name your HTML document style-guide.html and save it into your project folder on the server.
Before you begin to design your blog template, you need to become familiar with all the components that commonly make up a blog-based website. For this research document you will select two different blog templates to analyze and inventory their contents. After that, you will research design trends among the types of blog-based website in the domain you chose to design.
The research document should be a pdf with three pages — two with the template inventories and one with your blog design inspiration. Name the pdf blog-research.pdf.
Here is a screenshot of a sample document.
Create a folder named blog-template. This will be your main folder for this blog design project. Place the pdf in the project folder and upload it to the server.
Watch this Lynda playlist about the process of designing UI systems. When finished, take this quiz.
| Date | In-Class | Homework |
|---|---|---|
| Thurs 10/25 |
|
|
| Tues 10/30 |
|
|
| Thurs 11/1 |
|
|
| Tues 11/6 |
|
finish donation web form |
| Thurs 11/8 |
|
finish documentation |
| Tues 11/13 | final documentation due |
The purpose of wireframing is to present the design concept and the basic function of the product to your clients.
Using Adobe XD, create an interactive wireframe prototype that simulates the user experience of your donation form. You will be testing this prototype on volunteer testers, so make sure you are thorough, although it is fine to test certain specific portions of the process before you have finished the entire prototype.
Watch the Lynda playlist about wireframing in Adobe XD. If you need more instruction, search for other resources or watch more videos from that same Lynda course.
A high-fidelity (sometimes referred as hi-fi) prototype is an interactive representation of the product in its closest resemblance to the final design in terms of details and functionality.
Using XD, create a hi-fi prototype with as much functionality as needed, and final design details. Be sure to save a copy of your wireframe prototype.
Conduct user testing on the hi-fi prototype. Test it on a minimum of five new participants, using at least three task scripts. Document your results with notes and video/screen capture.
Before you begin this round of user testing, use this form to submit your three tasks for approval. I also suggest using this moderator script during your testing.
For more instruction on Adobe XD, here is a playlist focusing on using XD for hi-fi quality designs.
This is the part where you create a "functional" HTML web form based on your hi-fi-prototype, including any revisions that resulted from the user testing. By "functional," I mean that all of input elements should be interactive and that the flow of the screens is accurate. It does not need to function in terms of any behaviors that would require Javascript (such as communicating with a database, or inline error detection). Some of these things you we need to simulate creatively.
Try to recreate the design of your hi-fi prototype as closely as possible. Be sure to customize the style of your input elements.
This is the final round of testing that we will be doing in class. Take careful notes to include at the end of your documentation.
The remainder of class will be devoted to finishing the documentation and uploading the project. Save the final donation site in a folder named donation. Inside that folder, also include your documentation page. Name it donation-doc.html.
Don't forget to name the actual donation form index.html. Upload the folder into your GD150 directory on the server.
At the end of the project, your will submit an HTML document they will contain the following
★ Don't forget to post your quotation poster somewhere on campus and send me a photo!
Using your poster from the previous assignment as a mockup, make a webpage with the same design. Flex your typography skills and create something as close to the original design, while still being responsive.
You may complete this assignment at your own pace. It isn't due until the end of the semester.
Save the page into a folder called ethics-quote and save it into you GD150 directory on the server.
Save your project into a folder named timeline and upload it into your GD150 folder on the server. don't forget to save your home page as index.html
Upload your timeline mockup images here.
For Thursday, have the content of your scrolling timeline website ready so that you can start the mockup process. Your content should contain the following elements.
What is mitosis?
Timeline: The Black Lives Matter movement
Modern Art Movements: 1870s to 1980s
Evolution Of The Cell Phone
The History of Hip Hop
1. Watch these videos:
2. Read this article: Complex Selectors by Shay Howe
4. Start with this codepen and style the two links so that they are different. Be sure that you style both the normal and hover state.
See the Pen Getting more specific by Rusty Robison (@rustyrobison) on CodePen.
Your final design should contain the following components
background-image property to add graphic elements to the designFor help with responsive design concepts and code, watch this Lynda playlist.
CSS Zen Garden is an online project challenging designers to harness the power of CSS. Using the same HTML file, numerous layouts have been created by many designers using only CSS — each one distinct from rest.
Now it's your turn. Download the HTML file, link it to your own stylesheet, and get started. The only part of the HTML file you are allowed to edit is the <link> tag to your
stylesheet. Do not add any elements, classes, id's, etc.
Use this as chance to become more familiar with CSS grid, flexbox, and combinator selectors. There are links to helpful resources on the schedule page.
You can find a glossary of some vocabulary terms here.
Create a webpage about your summer break. This could be anything at all — a vacation, shoes you bought, a list of movies you watched, maybe the fantasy vacation you wish you'd taken. The point of this assignment is simply to wake up your brain and refresh what you remember about writing html and css. Start with the basics of simply creating a blank html file. Then add a header or some body copy. See if you can add a photo. Refresh your memory on how to use a google font. Ideally you would have a minimum of some text (using a web font), an image, and some css styles. However, the most important thing is that you go at your own pace and do what you are comfortable with.
I don't care how messy your code is. I won't be looking at it. Just make something and bring it to class.
Maybe one of my youtube videos would help. Or maybe the interactive tutorials at codecademy.com.